|
By Jerry Tardif
Editor's note: This article is published in the May 2009 issue of "Perfect Horse" magazine — an additional photo has been added.
"Perfect Horse" also has articles about many other important aspects of horses, training, and their care — check them out!
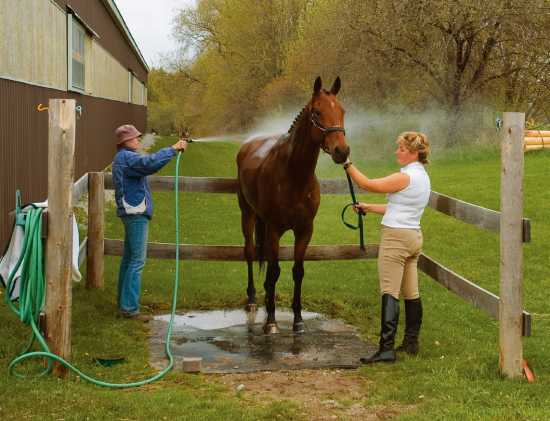
A horse wash area is a wonderful amenity at a barn.
It provides a place to clean your horse without a lot of setup work or making a mess.
And a clean horse is a healthy horse.
You can create a wash area inside an empty stall in the barn or in an outside space beside your barn.
This article will describe how to build an inexpensive outdoor wash area, but the suggestions are simple enough that you can also incorporate them into a wash stall within your barn.

|
|
A horse wash area is a wonderful amenity.
It provides a place to clean your horse without a lot of setup or mess.
The most important aspect is to find a location with adequate drainage and good runoff patterns, then you can build from there.
|
Start by selecting a suitable location for your wash area.
Most people choose a space near their outside faucet so water will be handy, but that shouldn't be the first selection criterion.
Think about drainage and runoff.
Soil, in and of itself, is not a good base for your wash area.
Even on a grassy area, it won't take many baths with the weight of a moving horse for the grassy area to get churned up and turn to mud.
A much better idea is to put down a solid footing that will last.
You'll want an area of at least 8 feet x 8 feet — but 10 x 10 or 12 x 12 would be even better.
You want enough space that you can move around your horse while both of you stay on the base.
Second, this location must be evaluated from a runoff perspective.
Your wastewater will contain detergents, remnants of fly spray, grooming products, wound salves, and more.
You don't want that runoff to flow into ponds, brooks, streams, and/or wetlands where it can harm other wildlife.
You don't want the surface runoff to wash across your driveway and sidewalks, where it could form a slick surface that's dangerous to walk or drive on. And you also don't want it to wash down through your manure pile, paddocks, or gardens.
A good location for a wash rack is an area with good soil drainage surrounded by an area of grass or weeds that will catch over-spray and any runoff that doesn't drain into the soil without harming wildlife or creating a slipping hazard.
With the location selected, now turn your attention to the base.
Concrete. The most obvious material to use to build a base is concrete.
Begin by digging a shallow footing area about 4 to 6 inches deep, building a form, and pouring a concrete pad.
Pay particular attention to two aspects of the concrete's surface: slope and texture.
You don't want to finish the concrete pad level; rather, you want it to slope in the direction that you want the runoff to go.
But just a slight slope is needed, perhaps 2 to 3 degrees (one-quarter inch per foot).
As for texture, you don't want a smooth surface like a basement or garage floor produced with a metal trowel.
Rather, use a wooden trowel to create the kind of rough surface you would want on a sidewalk.
Place rubber mats or stall mats on the concrete.
The concrete's rough surface will provide friction and keep the mats from sliding.
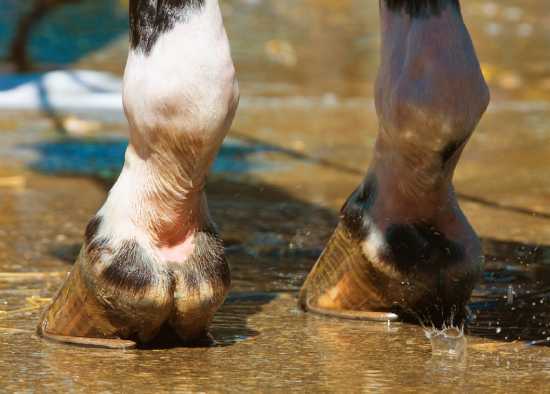
The mats will provide a cushion and also allow you and your horse to remain stable, reducing the chances of slipping.
Without mats, the concrete surface is not only hard on the feet, but steel horseshoes can also easily slip and slide.
Pavers. Another approach that's easier and faster to install is pavers.
But before putting them down, you need to assess the soil drainage.
A soil percolation test ("perc test") is a good idea, but not absolutely necessary if your wash area will be used only infrequently.
If the soil drains well, you could place the pavers directly into that soil, forming a square grid with each paver about one half to three-quarters of an inch apart.
An even better idea is to dig out the area as you would for concrete, line the perimeter with railroad ties or 6 inch x 6 inch pressure treated lumber, line the bottom with filter fabric, and fill the area with a half inch or so of crushed stone.
(The filter fabric is not absolutely necessary, but it will reduce the degree to which the crushed stone is pushed into the ground from the weight of the horses.)
Finally, place the pavers into the crushed stone while maintaining the one-half to three-quarters of an inch separation mentioned above.
This approach provides a "catch area" for the runoff to be captured and to drain through the soil.
It works well in areas where drainage isn't as good and provides more time for the wastewater to flow into the ground.

|
|
Concrete makes a great base, but pay particular attention to slope and texture.
Slope it in the direction that you want your runoff to flow, and create a rough surface to reduce the risk of slipping.
You can also add mats on top of the concrete to reduce concussion and slipping.
|
Locating a water supply near your wash area — while convenient — is not as important as good footing and drainage.
If you're forced to install your wash area away from a faucet, you can run a hose from it to your wash area.
In an outside wash area, you won't be using it during cold weather.
Make sure to remove the hose during the winter season so you need not concern yourself with freezing issues.
A nozzle is a useful accessory.
If you don't use one, you'll waste a lot of water.
If you choose the wrong one, you can frighten your horse or even cause him pain — be aware of how forceful the water jet is.
A wonderful nozzle for this application is a plant-watering nozzle, also sometimes called a gardening wand.
These devices are inexpensive and provide a soft wash of water akin to a watering can except that it's fed from a hose and doesn't need to be refilled.
Make sure to get one with a spring-loaded valve that you press to turn on the water and release it to turn off the spray and conserve water.
Some have short handles, but I prefer a longer handle that allows even shorter people to easily reach above a large horse's head and back.
Finally, we come to securing your horse at this wonderful, new wash area you've built.
If the wash area is adjacent to the barn or another building, you can just install a tie ring there.
If it's in a more open area, sink a 10-foot long 4 inch x 4 inch pressure treated timber four feet into the ground at each end of the wash area and install cross-ties between them.
That will help ensure your horse has enough movement to not feel confined, but limits him enough so you're not dealing with a squirming horse.
Be sure to adequately tamp the area around the timbers to make them solid and stable tie-up points.
Consider equipping your cross-ties with some type of breakaway device that will allow your horse to break free if something spooks him at the wash area.
You can do something easy and cheap, such as tying a piece of baling twine to each tie ring and then affixing your cross-tie line to the baling twine.
The baling twine is strong enough to indicate to a horse that he's tied and shouldn't move.
If he panics for any reason, though, he can break free instead of hurting you or himself by thrashing against his tie points.
Get a hose hook at a home supply or hardware store and mount it on the back side of one of the posts — it will provide a convenient storage location for the hose.
Be sure to select a hose hook that doesn't protrude too much and has no sharp edges so it won't present a danger to you or your horse.

|
|
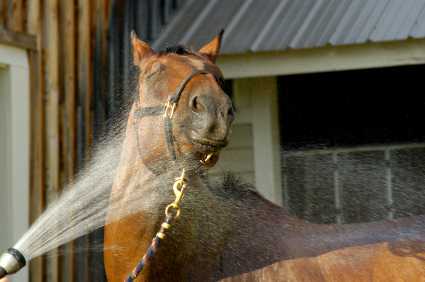
A horse enjoying a cooling spray after a ride.
|
Now that it's ready, you'll really enjoy your new wash area.
Besides bathing your horse periodically, it's also great for washing off sweat after a hard or hot ride.
This is better for your horse's skin and hair coat than letting the sweat sit on it, and it also helps cool him down.
It's also great in an emergency if you need to cleanse a wound or provide cold therapy for sore or inflamed joints.
Establish some common-sense rules for your wash area as well.
For example:
- Don't wash or rinse more than one horse in the wash area at a time.
- Don't use the wash area when workmen or other activity is happening nearby, such as cutting the grass.
- Don't allow anyone using a corded appliance (radio, hair dryer, clippers, weed wacker, etc.) to be near the wash area when it's in use.
Conversely, don't let anyone bathe a horse while such work is underway.
Fortunately, a wash area requires some maintenance, but not a lot.
You want to pick up horse droppings quickly so that manure isn't washed down into your drainage area to clog the crushed stone passages and soil.
And even with a concrete base, you also don't want it being washed away into undesired areas, such as the aforementioned ponds, brooks, wetlands, driveways, sidewalks, or your neighbor's in-ground pool.
If you installed the pavers, you need to re-level them periodically so you don't have tilted or uneven pavers providing a stumbling hazard to you or your horse.
If you installed the crushed stone, the pavers will remain straight and level for a much longer period of time, but you still may want to add a little extra stone over the years if you notice some has settled lower in certain places.
If you've properly located and constructed your wash area, it will last you many years.
Who knows? Going to the wash area after a long ride in the hotter weather may become a ritual that you and your horse both look forward to enjoying each time!
Besides being an avid trail rider, Jerry Tardif is a technology consultant and a horse and nature photographer in SE Connecticut — see his work at: www.jerrytardif.com.
He is also co-founder and President of QueryHorse.
Back to Article Index
|