|
By Jerry Tardif
For us horse lovers, when spring rolls around, thoughts move to riding.
Or if you've been riding all winter, to riding lots more, both in shows and at our favorite locations.
For many of us, that means trailering our horses to those locations.
But before you hitch-up and load Trigger aboard, it makes a lot of sense to assure your trailer is ready to safely go.
It's already had a prior season's travel wear and tear and then sat out in the cold wind, rain, snow, and the associated condensation inside that comes from those large temperature and humidity swings.
So, the first thing we should do is perform an inspection and some seasonal service.
This annual check could save you and your horse lots of hassle and inconvenience by not getting you stranded someplace away from home.

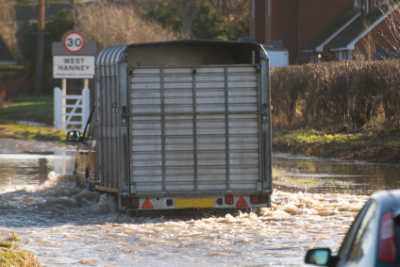
Water Entering Wheels and Trailer During Riding Season Can Cause
Long-Term Corrosion Problems Over Winter As Well As Immediate Problems
Start by performing a thorough inspection.
It won't actually take very long, but it can identify problems needing attention.
Bring a pad and pen with you so you can record anything you see that will require further inspection.
Also bring a flashlight so you can see well when underneath.
- Outside Inspection – First, take a slow walk all around your trailer and look it over very carefully.
Did branches or any other debris fall upon your trailer during the colder months?
If so, was any damage caused?
If there was, you need to check if that damage made one or more holes that have allowed rain or snow into your trailer or broken any previously working parts, such as running lights.
Of course, if major damage has occurred, such as being hit by a fallen tree, you already know you've got lots to do and fix.
But do make sure that even small fallen hits are investigated.
Also, look for signs of rust.
If your trailer is aluminum, it can still have corrosion,
While aluminum is less prone to various forms of corrosion than steel, it is not immune.
- Inside Inspection – Second, go inside your trailer and check for leaks and corrosion in there.
It may actually be easier to see problems from the inside because you'll be able to see the light of outside if penetrations exist.
- Undercarriage – Next, check the underside of your trailer.
This is an unappealing task, but it's very important to check the frame for rust or corrosion.
Most aluminum trailers still have a steel frame with steel hardware because of its greater strength.
Look at all the joints and welds for stress fractures (your flashlight will be of great help for this task).
These will be cracks that are starting to form and will only grow worse as time and use continue.
Also look at all fasteners for loosening whether they be screws, bolts, or rivets — record any problems or loosening you see.
While you're underneath, take a good look at the floor for signs of rotting or corrosion and be sure to make note of where it is — you'll need to also check those locations from the top.
- Flooring – Now, go inside the trailer and examine the floor.
Remove any mats so you can see the entire floor.
Floors come in several different types.
If wood, is it sound?
Is there any rot?
If so, you need to replace rotted floor boards so your horse won't step through and break or even lose his leg if it happened while underway.
If an aluminum floor, do you see any pitting or other corrosion?
Did you see any signs of it from underneath?
If so, you should have an idea of where it was; now examine it's top side to get an idea if the problem is just starting or has significantly developed.
If you find anything, you should again look at the floor from the underside.
Did this just start or is it a problem well underway?
- Wheels and Tires – Look at all the tires.
Are there any cracks in any sidewalls?
By this time, it's highly likely that they're all somewhat underinflated.
Make sure to inflate them to the manufactures recommendations (not the max PSI listed on the sidewall).
Also, look at the tread depth — is there enough tread for another year's worth of hauling?
Place a penny with Lincoln's head facing the tire.
Does the top of his head meet the tread depth or even go into the tread?
If so, the tire is worn out and you need to replace it with a new one.
Perform this inspection on all tires, and don't forget your spare tire.
It, too, will lose air during the year and can develop cracks as it ages through exposure to atmospheric ozone.

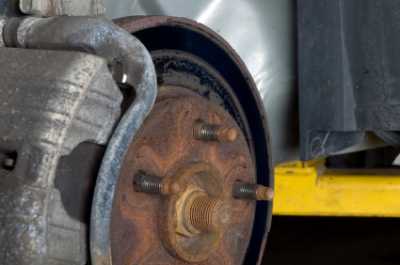
Rust in Wheel and Brakes
- Lights – Plug the trailer harness into your tow vehicle and turn on the parking lights.
Now, walk around the trailer again and take note of any lights that aren't lit.
Those lights may need new bulbs.
But often, the screws holding them on the trailer may just be rusted where they enter the trailer skin.
Those screws are the usual method of grounding the light and completing the circuit.
If they rust, they break the connection and the bulb won't light — replace those screws before replacing the bulb and you'll usually fix the problem.
This is especially true for trailers using LED bulbs — they almost never burn out for the life of the trailer.
- Brakes – Fully connect your hitch and safety chains to your tow vehicle and take the trailer for a ride.
Do you feel any dragging?
Do you hear any grinding or rubbing sounds?
If so, immediately stop and investigate.
If everything's ok, continue and test the brakes.
Does the trailer stop normally?
Do they feel properly adjusted?
Take out the Breakaway Brake battery and charge it — you need to do this at the beginning of each season.
If you don't, it may not work when you need it most.
- Wheel Bearings – You should have your wheel bearings inspected and repacked at least every three years.
The manufacturer of your trailer make recommend doing it yearly, but if not, don't go more than two years.
Wheel bearing grease dries and gets hard over time.
And the heat from friction on long trips can heat it enough so that it runs out of the bearings.
Either way, the bearings are not getting proper lubrication if the grease is hard or is no longer there, and the bearings will burn out quickly.
Only a periodic inspection and repacking at least every two years will help reduce the chance of bearing failure.
- Cleaning Inside – Make sure to remove old bedding from the floor and then sweep out remaining debris.
Then, spray the floor down and remove old animal waste products from the prior year.
This will help remove bacteria, fungi, and other pathogens that have taken up living quarters in such material to reduce the chances of your horses getting infections, especially of their hooves.
When finished, let the floor dry and then replace with new bedding.
Similarly, throw out any old hay left in hay bags, mangers, and hay nets — you don't want your horses getting sick eating any of that stuff.
Replace with fresh hay when you take them out for a trip.
- Cleaning Outside – It's a good idea to wash your trailer and wax it.
If it's like most trailers, it sits outside all year round in the elements, especially with the Sun beating down on it with finish-damaging ultraviolet rays.
Putting a good coat of wax on it will not only make it look like new again, it will also protect the roof and sides from corrosion and help prevent cracking that causes leaks.
The foregoing will help you keep your trailer in good condition for many years.
It's not that much work if you perform this service once each year and maintain your trailer in good shape from the beginning.
It's a lot more work and more costly to wait until your trailer is almost falling apart and then trying to save it when some parts are already beyond repair.
If in doubt about your ability to do any of the foregoing, schedule an appointment with your trailer dealer or your local service station.
They'll at least know what to check and inspect from a mechanical perspective so you don't end up breaking down someplace far from home.
Besides being an avid trail rider, Jerry Tardif is a technology consultant and a horse and nature photographer in SE Connecticut — see his work at: www.jerrytardif.com.
He is also co-founder and President of QueryHorse.
Back to Article Index
|